This brief tutorial aims to be a simple, easy-to-follow
guide on unleashing the full power of your CloudOMR.com account. Once you’re
finished reading this, you’ll be able to perform the following tasks:
- Getting To Know Your User Account's Dashboard;
- Designing And Downloading A Simple Answer Sheet.
1. Getting To Know Your User Account's Dashboard
When you login to CloudOMR using your user account,
you’ll start at your account's Dashboard page:

Here you can find two very important
data grids:
-
My Sheets, which shows all
the sheets you have created;
- My Tickets, which shows all the image tickets
you have submitted.
Both grids show the last 10 results by default; you can
always change using the grid filters.
The upper menu toolbar contains, among other tools, the two most important features of CloudOMR: “Design
Sheet” and “Upload Scans”. We’ll start focusing on the first.
2. Designing And
Downloading A Simple Answer Sheet
Answer sheets designed using CloudOMR consist of PDF documents containing three distinct parts: a
header zone (which contains data such as sheet’s author, target universe who will answer this sheet, a date
which will appear on the sheet, optional additional instructions, etc), an
answer
zone (where your students or surveyed individuals fill the answer "bubbles" for each
question) and a
sheet ID zone (which identifies the sheet on CloudOMR database
using a special code).
Designing a new answer sheet is extremely easy. As an example, we’ll design a very simple answer sheet with minimal data on
it. Follow this steps:
1. Click the "Design Sheet" link on the upper menu toolbar:
 2. The Design Sheet Wizard will appear on screen, showing four steps:
"Creation Mode", "Header", "Questions" and "Confirm Questions".
2. The Design Sheet Wizard will appear on screen, showing four steps:
"Creation Mode", "Header", "Questions" and "Confirm Questions".
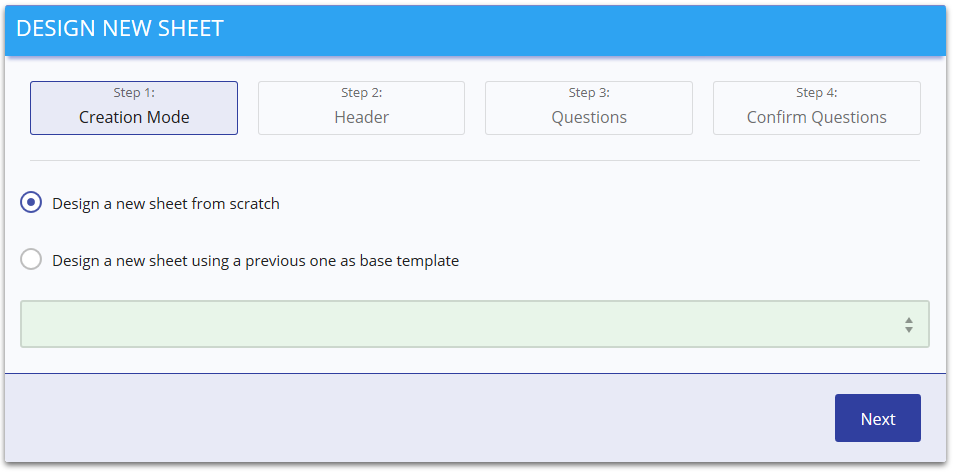
3. On "Creation Mode", you can choose whether to design a blank sheet, or clone a previous
one as a starting template. For our example, choose the first option and click
“Next”.
4. On "Header", fill
with some data the following mandatory fields: Title, Author, Target, Date. Leave other fields blank or with default values and press “Next”.

5. On "Questions",
add 3 questions with bubbles as “A-B-C”, using the upper “Multi-Question Tool”. The questions
will be added on the lower grid. Change each question bubble settings so they
look as shown and press “Next”.

6. On
"Confirm
Questions", confirm the final questions grid has the rights settings for
each
question and press “Create Sheet”. This will show a message onscreen
confirming your sheet has been created and redirecting you to your
Dashboard.

7. Your answer sheet has been created and it now shows
on your “My Sheets” grid on your Dashboard. To download it as a PDF file, click
on the PDF icon below the header “Actions”. That’s all there is to it!

We hope you’ve found this guide
useful. We'll see you on our next tutorial: Part II - Print, fill and scan your answer sheets.